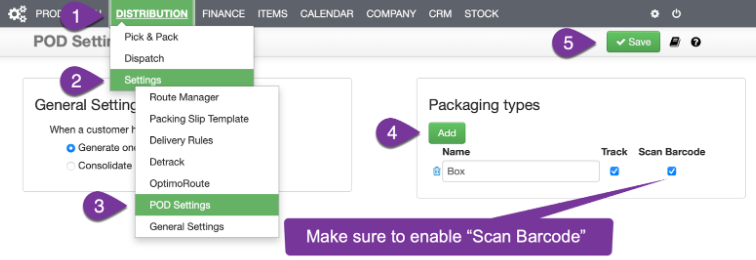
1. Create a Tray (Box, Crate, or Other) #
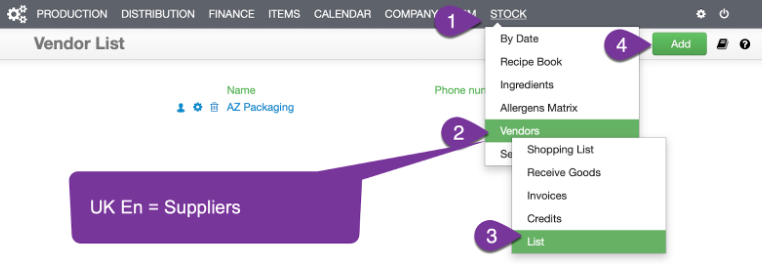
2. Add a Vendor for the Tray #
3. Set Up the Tray Details #
Stock › Ingredients › List
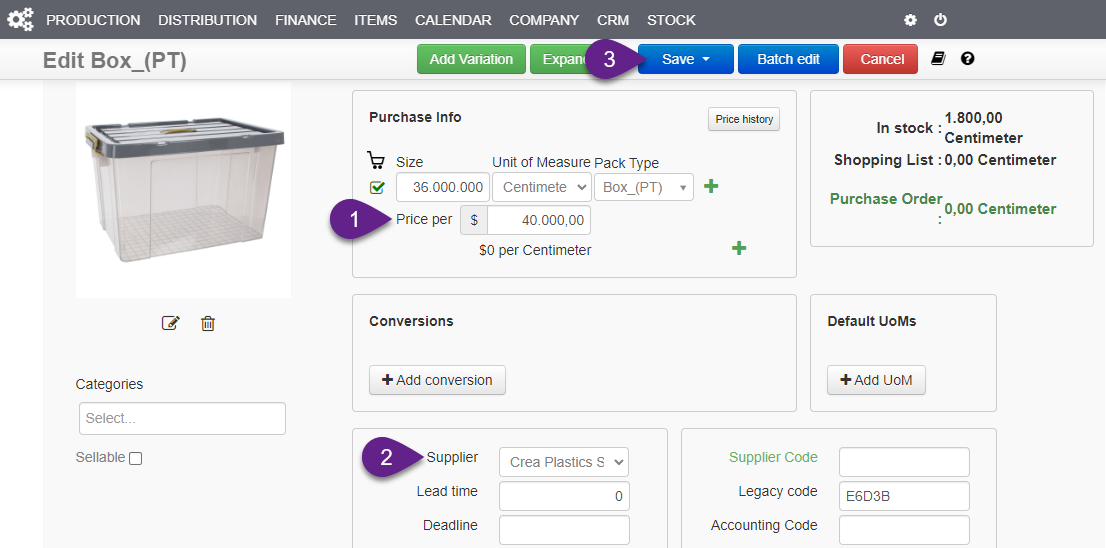
- Click the pencil icon to edit the tray you created – it may displayed as “Box_(PT)”
- Change the name if needed
- Link it to the vendor/supplier you created earlier
- Fill in other details like price, etc.
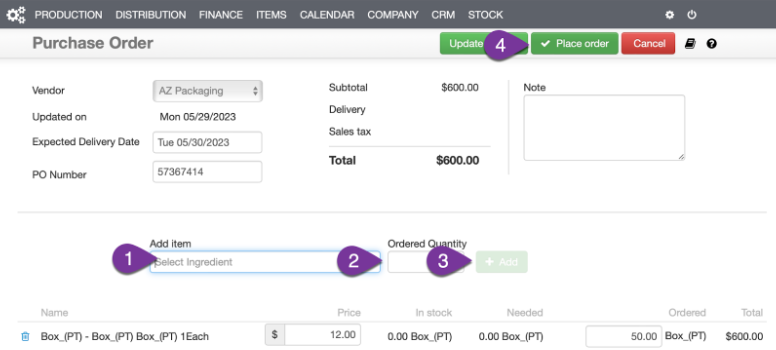
4. Make a Purchase Order for Trays #
Stock › Vendors › Shopping List › Purchase Order
5. Receive the Trays into Your Inventory #
Stock › Vendors › Receive Goods
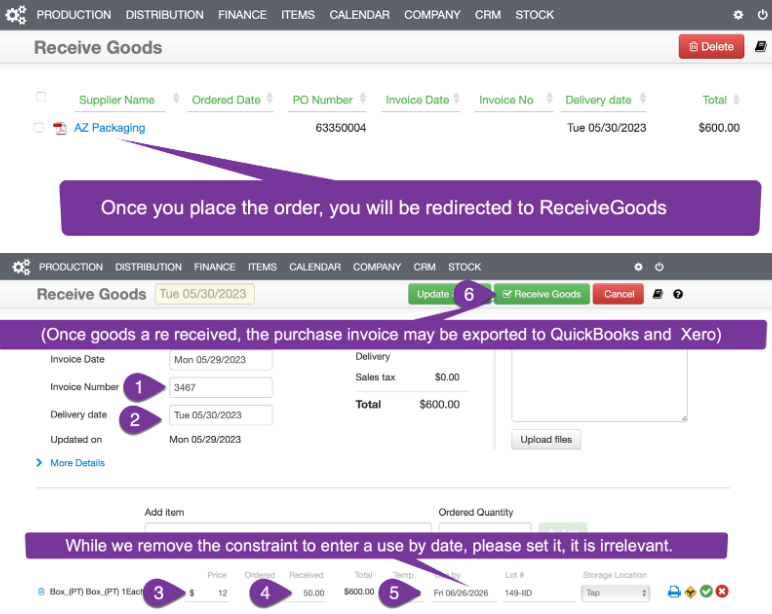
- After submitting the purchase order, you’ll be redirected to Receive Goods
- Mark the trays as Received
- This automatically creates the purchase invoice
NB: You may also export this invoice to QuickBooks or Xero later.
6. Print Tray Barcodes #
Distribution › Dispatch › Scanned Packaging
Steps:
- The system automatically creates barcode numbers (starting at 100000000001)
- You can get the barcode list and format it for printing
- You can use Excel or Google Sheets to create a barcode
- Set font to Libre Barcode 39
- Print and stick the barcode on the tray
- Print on waterproof, permanent labels and stick the barcode on the tray
- You may want to print your business details, like logo, telephone, email and address on
- the barcode label.
- For printing, you may contact Achile in the UK: 07776 188 248. He knows a man who knows a man…
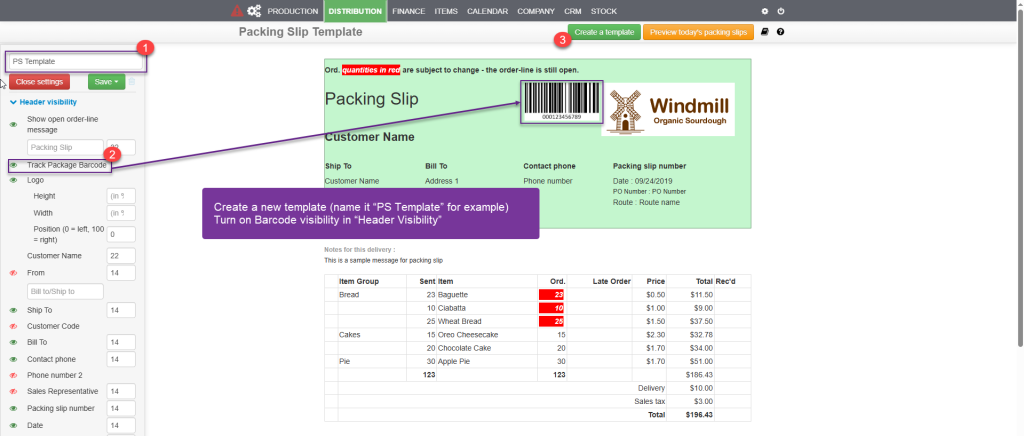
7. Create a Packing Slip with Barcodes #
Distribution › Settings › Packing Slip Template
8. Assign the Packing Slip to Addresses
Gear Icon › Batch Edit › Customer Addresses
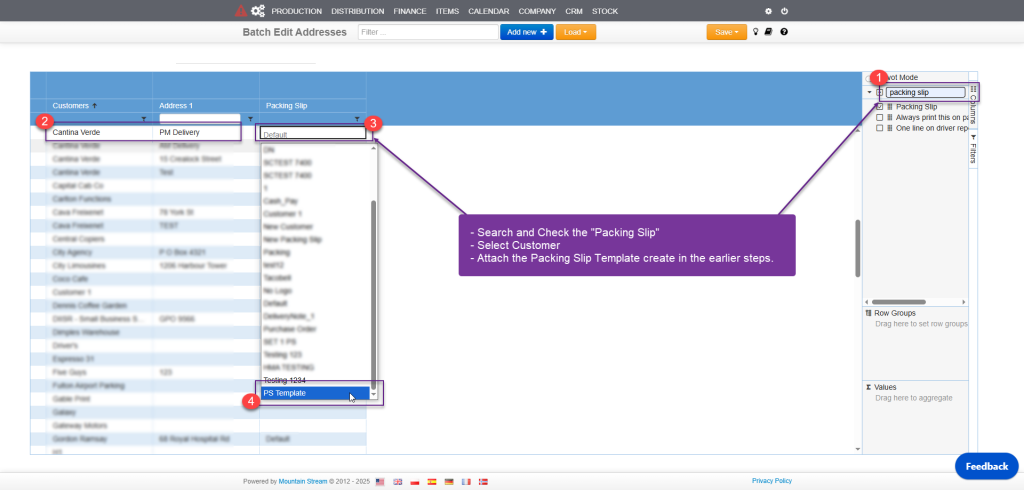
- Show the Packing Slip column
- Double in the packing slip field of the customer to assign
- Choose the PS Template you made earlier
- You may copy paste to other customers
- Save
Done! Now your trays can be tracked when they are delivered to this customer.
