1. Go to Items › Master Catalogue › Batch Edit › Add Column and call it ‘Slicing Option’.
2. Populate the values for every item that we want to appear in our report. We can add the thickness, for example: 16, 18, and 24. Or if you work in inches, ¾, ⅝, and so on. Other items may be sliced “Hinged” or “Lengthways”.
NB: The item name should include these values, as it saves confusion when ordering, packing, and billing.
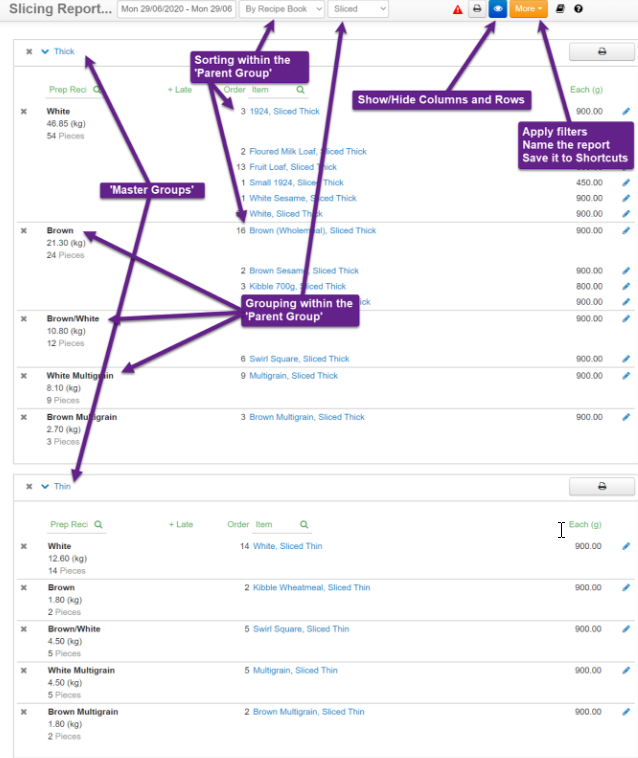
3. Now we can use these values to group and filter the Slicing Report. Only one value can be used to filter the report under ‘Filters’ Therefore, if we wanted to include multiple values, we would simply add another column, as follows:
- Create another column.
- Populate all the rows in point 2 above with ‘Sliced’ and the ones that are blank with ‘Unsliced’.
- Now we can use ‘Sliced’ to filter and show only ‘Thin’, ‘Thick’, ‘Extra Thick’, and ‘Lengthways’ and omit the Unsliced.
4. Put all the items on one page and group by the different options, or filter and only show one group per page.
Likewise, we may want to group customers together, perhaps to generate sales reports, or to organize production.
5. In this instance, add an attribute to the Customer List, and in the same way as in the previous example, we populate the values for each customer accordingly.
NB: There must be a one-to-one relationship between the item and the value. One item can be sliced ‘Thin’ but not ‘Thin’ and ‘Thick’. To create a ‘Thick’ sliced item, you must Clone the ‘Thin’ one and change relevant values. In this case, only the ‘Item Code’ and ‘Slicing Option’ and perhaps the ‘Price’.


