This guide will help you set up trays (like boxes or crates), register them into your system, print barcodes, and track their delivery using our Tray Tracking App.
1. Create a Tray (Box, Crate, or Other) #
Where to go:
Distribution › Settings › POD Settings

Steps:
- Look for “Packaging Types”
- Add a new tray (example: Box or Crate)
- Check the boxes for “Track” and “Scan Barcode”
- Click Save
This tells the system you want to track this tray type using barcodes.
The system will automatically create a matching inventory item behind the scenes.
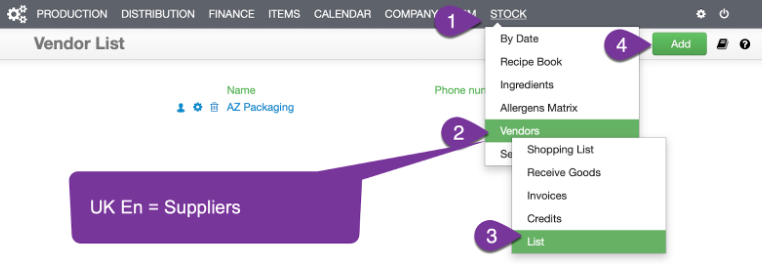
2. Add a Vendor for the Tray #
Where to go:
Stock › Vendors/Suppliers › List

Steps:
- Click Add Vendor
Fill in vendor/supplier name and details
(This is who supplies the trays.)
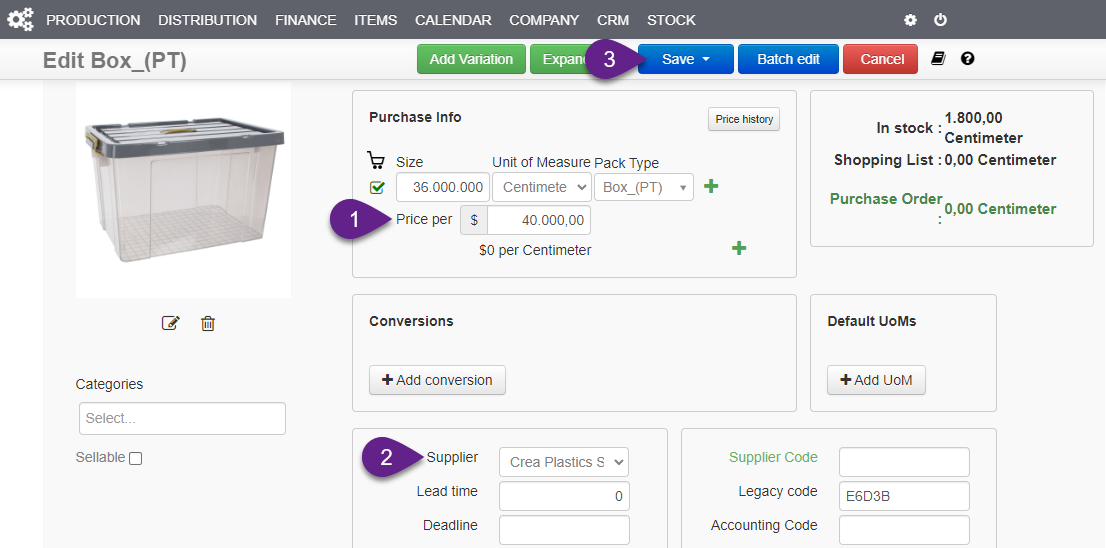
3. Set Up the Tray Details
Where to go:
Stock › Ingredients › List

Steps:
- Find the tray you created (it may look like Box_(PT))
- Click the pencil icon to edit
- Change the name if needed
- Link it to the vendor/supplier you created earlier
- Fill in other details like Item Name, Price, etc.
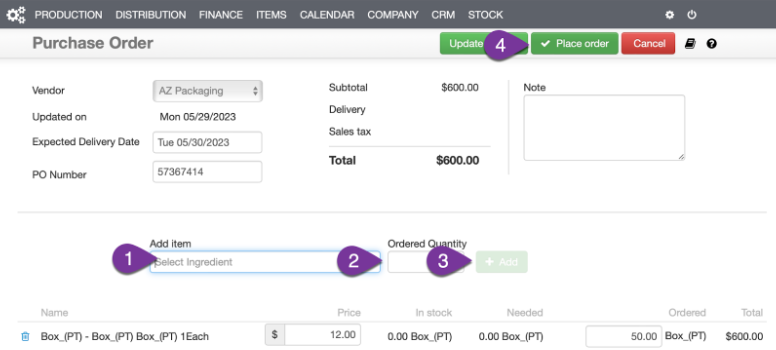
4. Make a Purchase Order for Trays #
Where to go:
Stock › Vendors › Shopping List › Purchase Order

Steps:
- Click the Purchase Order button
- Add the tray item, quantity, cost, and expected delivery date
- Save and Place the order
This step tells the system you are expecting trays to arrive.
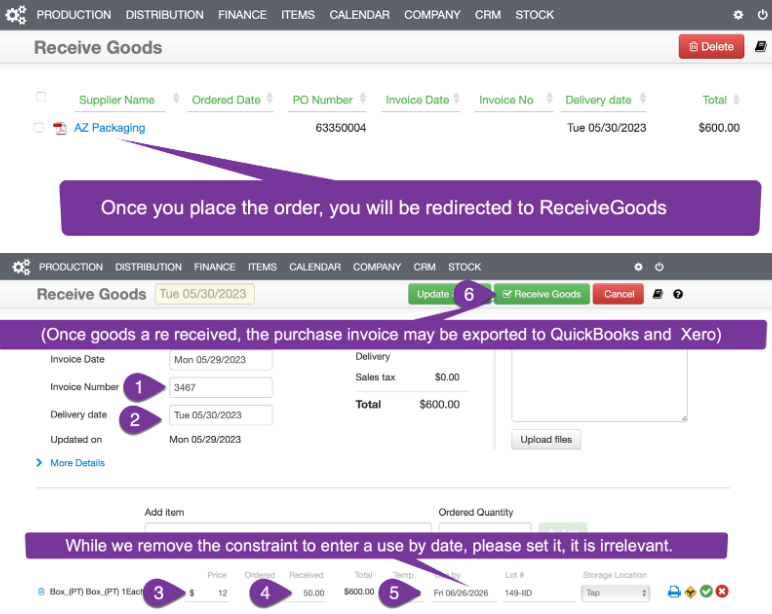
5. Receive the Trays into Your Inventory #
Where to go:
Stock › Vendors › Receive Goods

6. Print Tray Barcodes
Where to go:
Distribution › Dispatch › Scanned Packaging
Steps:
- The system automatically creates barcode numbers (starting at 100000000001)
- You can get the barcode list and format it for printing
- You can use Excel or Google Sheets to create a barcode
- Set font to Libre Barcode 39
- Print and stick the barcode on the tray
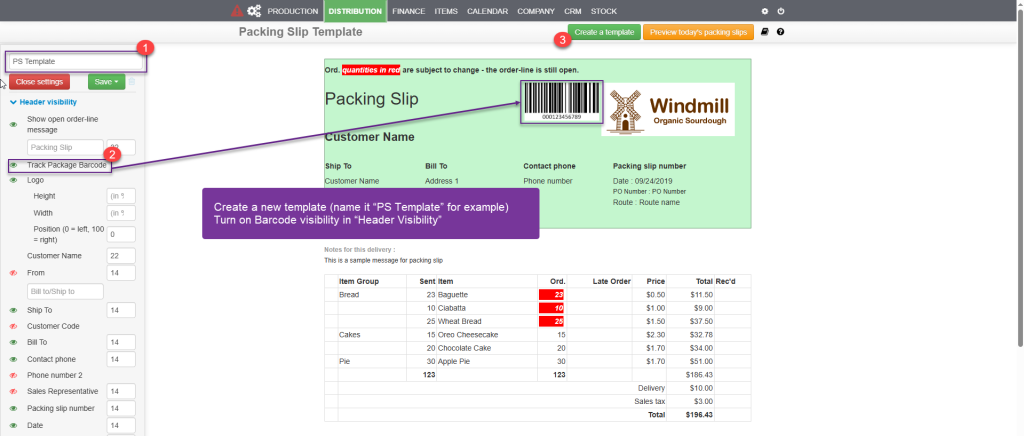
7. Create a Packing Slip with Barcodes #
Where to go:
Distribution › Settings › Packing Slip Template

Steps:
- Create a new template (name it “PS Template” for example)
- Turn on Track Package Barcode visibility in “Header Visibility”
- Save the template
This packing slip will now show the tray barcode for tracking.
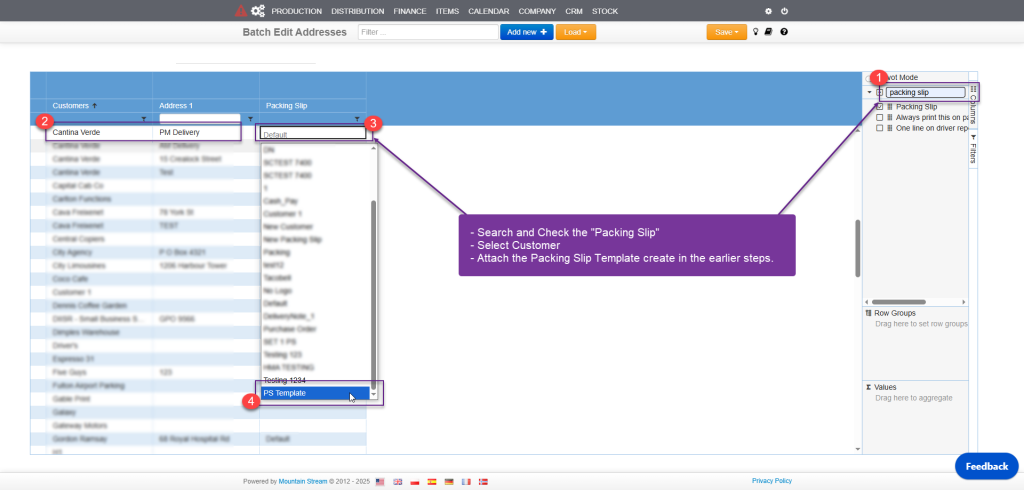
8. Assign the Packing Slip to a Customer #
Where to go:
Gear › Batch Edit › Customer Addresses

Steps:
- Find the customer
- Turn on Packing Slip
- Double click under the packing slip column
- Choose the PS Template you made earlier
Done! Now your trays can be tracked when they are delivered to this customer.
What Happens Next? #
Once trays are created and barcoded:
- They can be scanned during delivery
- Trays can be tracked and traced with the Tray Tracking App
- Proof of Delivery (PoD) can include tray barcode records